WARNING: Connecting the power cable to your Pixelcade PCB incorrectly could damage your device. Please read the instructions fully before proceeding. Your warranty does not cover damage caused by improper installation.
- Install LBPA 1.4 as per the instructions located here. You should disconnect the LED Marquee cable as you won’t need it any longer with your fancy new Pixelcade Mini.
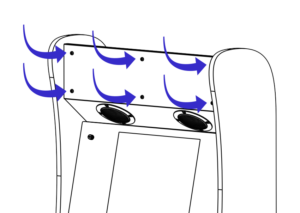
- Remove the 6 screws attaching the existing marquee and set 4 of them aside for later.

- Remove the 4 black screws securing the front panel of the Pixelcade Mini. Do not remove the gold hex standoffs.
- Using the 6ft power cable from the LBPA kit, connect one end to the BitPixel port on LBPA and the other to the female power connector on the Pixelcade Mini.

 Connect the grey IDC ribbon cable and the male power cable from the Pixelcade Mini to the Pixelcade PCB.
- Connect the 6ft USB-A male-to-male cable to USB 2 on LBPA and the other end into the Pixelcade PCB.
- Connect the male black and red power connector from the Pixelcade Mini into the power connector on the Pixelcade PCB.
- Insert the Pixelcade PCB into the opening for the Marquee. You can attach it to the cabinet using the adhesive standoffs if you’d like.
- Mount the Pixelcade Mini to the ALU Mini using the 4 screws you set aside in step 2. Be careful not to over tighten the screws or the mounting plate will bend causing a gap between the panels.
- The front panel is a fingerprint magnet, so here’s a tip to make it not have as many fingerprints during install. Peel the acrylic off one side of the front panel. On the remaining side, peel the corners just enough to expose the mounting holes. Attach the front panel with the protected side out using the 4 screws from step 3. Once it’s attached, peel the remaining paper off the panel.
Enjoy your Pixelcade! Don’t forget to install the PixelcadeX software from AppstoreX!